In this article, you will learn about our new software development kit (SDK) for Flutter, which supports an over-the-air (OTA) localization flow. We will see how to get started with the Flutter SDK and how to work with the OTA endpoints.
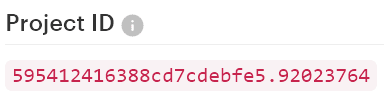
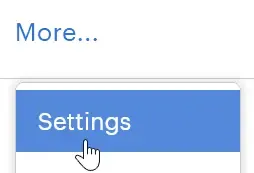
You will also need your Lokalise project ID. To obtain it, open the project in your browser, click More > Settings, and take note of the project ID:
OTA in 2 minutes
The term “OTA” stands for “over the air”. The Lokalise OTA service enables your users to get the latest translations on their mobile applications without you needing to submit a new version to be approved by either the Apple or Google app stores. Basically, over-the-air localization is a lightweight way to instantly update the content in your apps. It’s particularly useful for fixing typos, finishing translations on the fly, and adding languages.
Imagine the following scenario: You’ve just released a new mobile app with a new feature and a batch of new translations. The app is approved and users can download it from the app stores. However, you understand that one of the translations contains a mistake — it’s not crucial but still something that should be fixed as soon as possible.
Of course, you could release a new version and upload it to the stores but it will probably take a while to get your app reviewed. Instead, you can fix the faulty translation using the Lokalise web editor, generate an over-the-air bundle (an archive with the updated translations), and distribute this bundle to the end users. The bundle will be downloaded automatically when the app is loaded and the new translation will be displayed instead of the incorrect one.
This significantly cuts down the amount of time and manual work involved, and only requires the initial installation of an over-the-air SDK in the mobile app. Currently, we provide three official SDKs: for Android, iOS, and Flutter. We also provide a public OTA API that you can employ to build a custom SDK.
So, how does it work?
The idea is quite simple. Your mobile application should include a Lokalise OTA SDK that does the heavy lifting. When the application is booted on the user’s device, our SDK will automatically connect to the Lokalise over-the-air service and ask if there are any updates available on Lokalise. If updates are found, the corresponding translations will be downloaded and displayed to the user instead of the local ones.
Please note that the OTA bundle does not (and normally should not) contain all the translations for your app: it includes only the translations modified since the last app release. This way you can ensure that the bundle is slim and that downloading it does not take too much time thus affecting overall performance. To learn more about best practices when working with OTA, please refer to this article.
Installing and configuring a Flutter app
To get started, create a new Flutter application in the usual way:
flutter create to_do_app
Next, open the pubspec.yaml file and add the necessary dependencies:
Install these dependencies by running the following command:
flutter pub get
Adding translation files
Now we need to add translation files to our Flutter app in ARB format.
First, let's add the lib/l10n/intl_en.arb file:
{ "@@locale": "en", "@@last_modified": "2022-10-05T18:53:09+02:00", "title": "ToDo App", "list_title": "Todo list", "addButton": "Add Item", "title_addItem": "Add a new todo item", "hint_addItem": "Type your new todo", "button_addItem": "Add", "total_todo": "Total tasks: {count}", "pending_todo": "{count, plural, zero {You don't have pending tasks} one {You have just one pending task} other {You have {count} pending tasks}}", "completed_todo": "{count, plural, zero {You don't have completed tasks} one {You have just one completed task} other {You have {count} completed tasks}}"}
In this example you can see how to use placeholders ({count}) and how to implement pluralization.
We'll also add the lib/l10n/intl_es.arb file with Spanish translations:
{ "@@locale": "es", "@@last_modified": "2022-10-05T18:53:09+02:00", "title": "aplicación ToDo", "list_title": "Lista de tareas", "addButton": "Añadir tarea", "title_addItem": "Añada una nueva tarea", "hint_addItem": "Escriba aqui su nueva tarea", "button_addItem": "Añadir", "total_todo": "Tareas totales: {count}", "pending_todo": "{count, plural, zero {No tienes tareas pendientes} one {Tienes una tarea pendiente} other {Tiene {count} tareas pendientes}}", "completed_todo": "{count, plural, zero {No tienes tareas completadas} one {Tienes solo una tarea completada} other {Tienes {count} tareas completadas}}"}
It's important to generate Dart files from these ARB files, so run the below command:
dart run lokalise_flutter_sdk:gen-lok-l10n
The Dart files should appear under the lib/generated directory. Please note that these files are not meant to be edited directly.
Uploading translation files
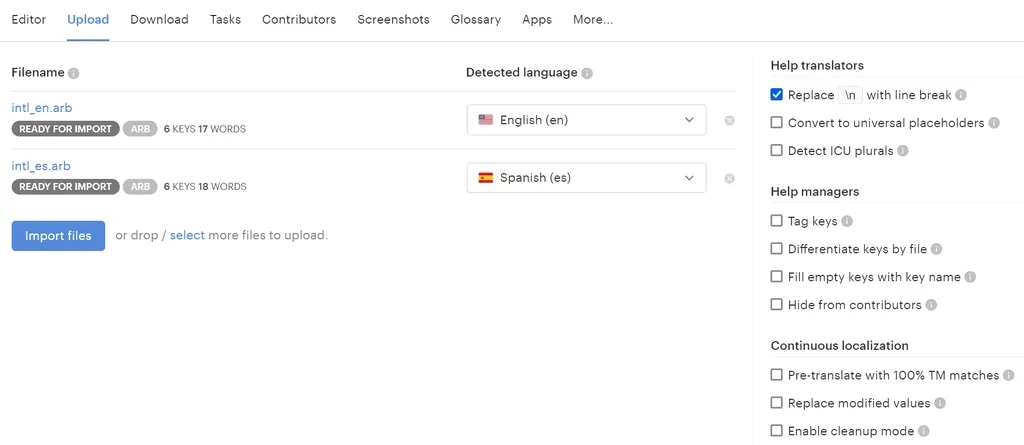
Next, upload the ARB files to your Lokalise project either via the web interface or via the Upload a file endpoint.
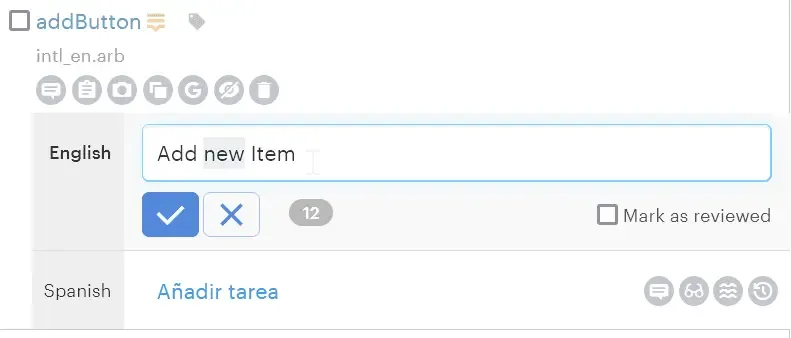
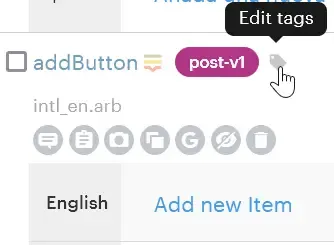
This step is required if you're going to use OTA later. Also, to see OTA in action, let's modify one of the translations. For example, modify the English translations for the addButton key and type "Add new item":
We'll see how to deliver this updated translation to the end user without the need to rebuild and republish the app. One last step is to assign a tag to this updated key so that we can easily add it to the OTA bundle later. Thing is, your OTA bundle should be kept as slim as possible and contain only the changes made since the last release. Therefore, click on the "tag" icon next to the key name and type something like "post-v1":
Generating an OTA bundle
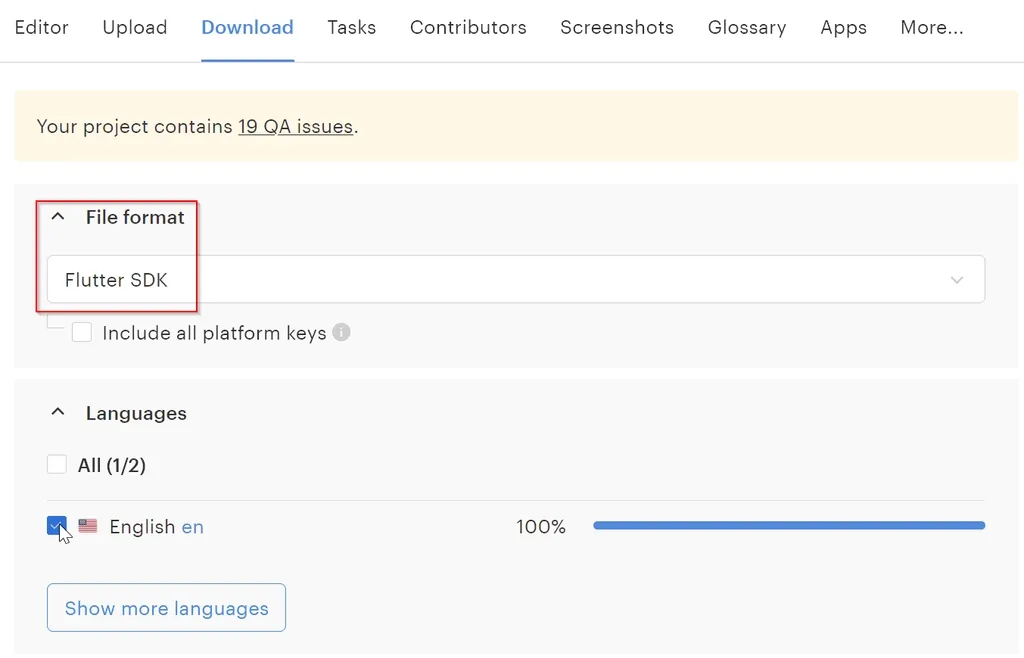
Now we have to generate a new OTA bundle containing our modified translations. To achieve that, proceed to the Download page in your Lokalise project. Choose Flutter SDK from the File format dropdown and pick the English language:
If you don't see the Flutter SDK format in the dropdown, please reach out to our support team by using the chat widget in the bottom right corner.
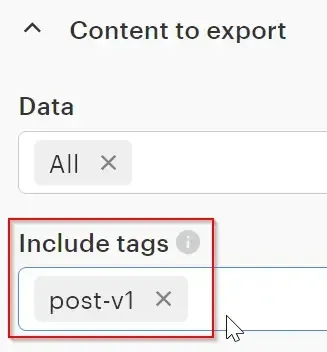
Also make sure to choose post-v1 tag from the Include tags field:
Once you are ready, scroll to the bottom of the page and click Build only. Your OTA bundle is now generated!
Obtaining an SDK token
To request an SDK token, open your Lokalise project and click More > Settings in the top menu:
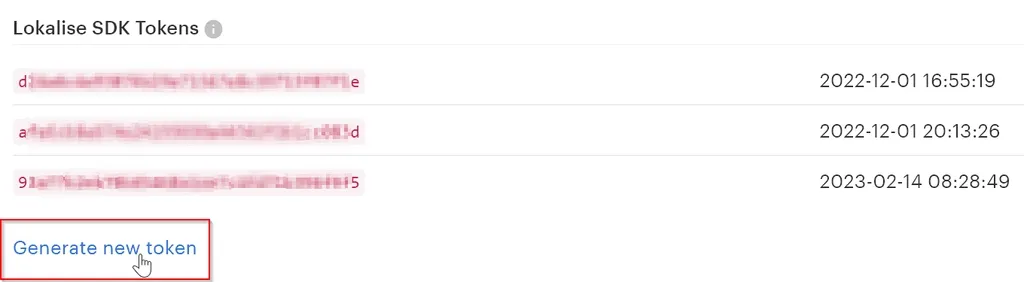
Next, find the Lokalise SDK tokens section and click Generate new token:
Copy the newly generated token and make sure it's not publicly exposed!
Managing OTA bundles
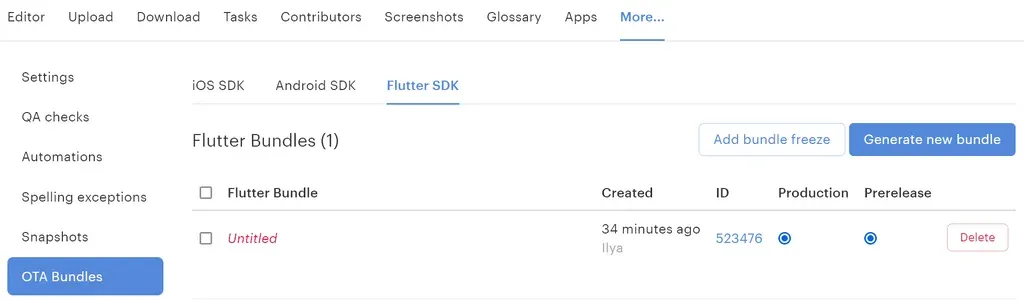
To manage OTA bundles, open your Lokalise project and click More > Settings in the top menu. Next, proceed to the OTA Bundles > Flutter SDK page:
Here you'll find all the generated bundles and will be able to manage them. For example, you can click on the "Untitled" text to give your bundle a name.
Publishing a bundle
On this page you can also publish a bundle for production or set it for prerelease. The difference between prerelease and production bundles?
The production translation bundle will be served to mobile users by default: in other words, the bundle is aimed toward stable app versions.
The prerelease bundle will be served to your users only if the mobile SDK specifically requests a prerelease version. It's usually utilized for testing purposes.
For example, if you have two different OTA bundles, you can toggle the Production and Prerelease switches:
Please note that there can be only one bundle published to production. For more fine-tuned control, you can create bundle freezes as explained in this guide.
Finalizing the Flutter app
Initializing SDK
Now let's open the lib/main.dart file and add these imports:
Provide your SDK token (not an API or JWT!) obtained in the previous step here.
Enter your project ID.
Set the preRelease to false as we've published our bundle to production.
This option should be provided only if you are using bundle freezes and would like to explicitly set the app version (or when automatic detection is not possible — for example, in Web apps).
Your app's class should contain localizationsDelegates and supportedLocales. Also note the usage of Lt.of(context).{keyName} to retrieve the translations.
Adding a screen
Also let's create the lib/app/views/screens/todo_screen/todo_screen.dart file:
Note the usage of Lokalise.instance.update() that shows a loading widget until translations are retrieved.
Also note that you can pass arguments when retrieving translations (Lt.of(context).pending_todo(pending.length)). This argument will be used to determine which plural form should be displayed to the user.
Now you can boot your application with any mobile emulator. OTA translations will be fetched automatically from Lokalise and they will take priority over locally stored translations. Specifically, the tooltip for the "add" button will contain the word "new" that we added in Lokalise.
For more precise control, you can take advantage of bundle freezes. A bundle freeze is basically a version range for which the bundle should be provided. For instance, you could say that bundle ID 52 should be provided only for customers who are currently using versions 2.0–3.0 of your app. Customers who remain on version 1.0, in turn, should obtain an older bundle (ID 51). To create a bundle freeze, you can use the OTA Bundles page or the Create freeze period endpoint. To learn more about this feature, please refer to the following article.
Conclusion
So, in this article we have seen how to get started with Flutter SDK and the OTA localization flow. If you have any feedback on this feature please reach out to us. Also, if you have any further questions, you can always contact our support team. Thank you for staying with me today, and until next time!
Ilya is the lead for content, documentation, and onboarding at Lokalise, where he focuses on helping engineering teams build reliable internationalization workflows. With a background at Microsoft and Cisco, he combines practical development experience with a deep understanding of global product delivery, localization systems, and developer education.
He specializes in i18n architectures across modern frameworks — including Vue, Angular, Rails, and custom localization pipelines — and has hands-on experience with Ruby, JavaScript, Python, Elixir, Go, Rust, and Solidity. His work often centers on improving translation workflows, automation, and cross-team collaboration between engineering, product, and localization teams.
Beyond his role at Lokalise, Ilya is an IT educator and author who publishes technical guides, best-practice breakdowns, and hands-on tutorials. He regularly contributes to open-source projects and maintains a long-standing passion for teaching, making complex internationalization topics accessible to developers of all backgrounds.
Outside of work, he keeps learning new technologies, writes educational content, stays active through sports, and plays music. His goal is simple: help developers ship globally-ready software without unnecessary complexity.
Character encoding: Types, UTF-8, Unicode, and more explained
In this article, we’ll explore various types of character encoding used in the world of information technology. We’ll break down why encoding matters, explain how they function, and highlight the key differences between ASCII, UTF-8, UTF-16, and the Unicode Standard. Understanding these differences is essential for correctly handling text in any software application, especially when working with localized time and date formats that rely on proper ch
Libraries and frameworks to translate JavaScript apps
In our previous discussions, we explored localization strategies for backend frameworks like Rails and Phoenix. Today, we shift our focus to the front-end and talk about JavaScript translation and localization. The landscape here is packed with options, which makes many developers a
Syncing Lokalise translations with GitLab pipelines
In this guide, we’ll walk through building a fully automated translation pipeline using GitLab CI/CD and Lokalise. From upload to download, with tagging, version control, and merge requests. Here’s the high-level flow: Upload your source language files (e.g. English JSON files) to Lokalise from GitLab using a CI pipeline.Tag each uploaded key with your Git branch name. This helps keep translations isolated per feature or pull request